Table
We need to create a table first in order to define tables and columns in CALS Studio. It must be created with the same name as the table name and column names created in the DB.
- How to Create
In the Object Explorer, choose the Table menu under Physical Layer.
In the Table List Screen, click the New button.
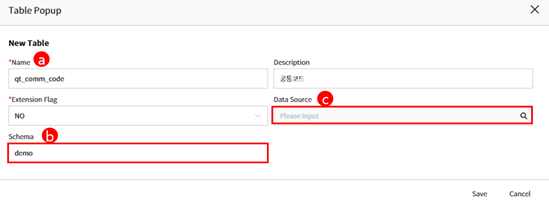
a. Name: Enter the name exactly as it is exists in the Database.
b. For Schema information, if the only difference is the schema in the default Database, do not specify a Data Source and just enter the Schema information.INFO
When creating a BO(Business Object) or AO(Application Object), if the Base Table is a Table with a specified Schema, the Data Source and Schema will be entered as blank. In this case, the Base Table will follow the Database Schema Information.
c. When selecting information from Data Source, the Schema will be automatically set to the DB Name upon choosing the Data Source.
Click on the created Table in the Table List, and then create all the Columns included in the table in the Column List screen at the bottom. Just like when creating a Table, you can create a Column by clicking the New button, which opens a popup window for creating the Column. At this time, make sure to create it with the same name as the Column declared in the DB.

INFO
When defining a table, the Extension Flag is set to “No” as the CALS Studio internal setting value..
INFO
When defining a table, there is no need to enter the data source if it is the application's default DB.
INFO
9 system columns (such as SYS_ID) are automatically configured when creating a Table, and they cannot be deleted or newly added. However, the Description can be changed
INFO
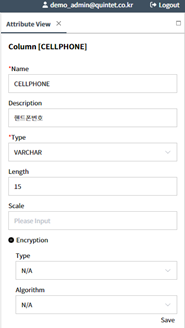
If DB encryption is required for a Column, right-click on the Column in the Column List and set the Encryption property value to manage it. You can choose between one-way and two-way encryption, as well as select the algorithms available for each. For both directions, please refer to this menu link Key Management - Column Encryption.