Key Management
Key Management is a screen where you can manage the bi-directional keys used for column encryption and decryption. You can generate keys using the desired algorithm, either AES or KMS-AES.
Screen Layout
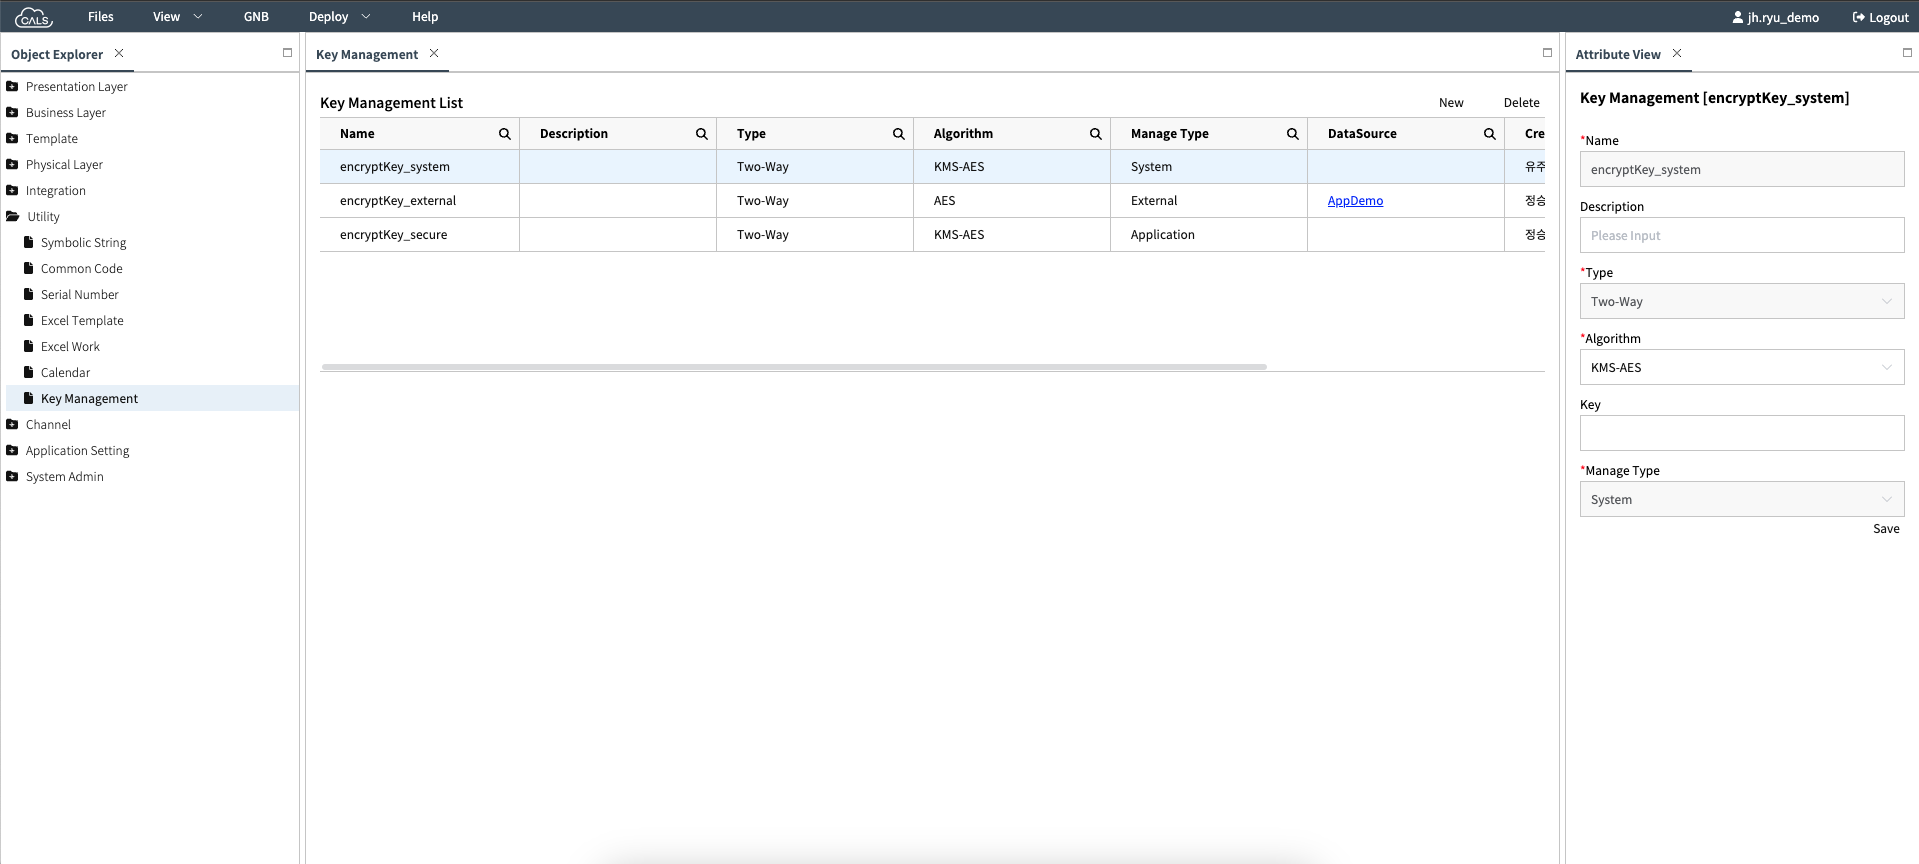
[Image1. Full Screen]
In CALS Studio, The My Key Management menu screen is largely divided into three areas.
List: The generated keys are displayed in list form. Interaction is possible with the selected key.
Attribute: It shows detailed information about a specific key and can be modified.
New Popup: This is the screen for creating a new key.
List
 [Image2. Key List]
This area shows the entire Key List. Each Column represents the following information.
Column Name Comment Values Name Key Name - Description Key Description - Type Key Type Two-WayAlgorithm Encryption Algorithm AES,KMS-AESManage Type Key Management Method System,Application,ExternalDataSource External DB Information - Create By Creator Name ex. Hongildong Create Date Creation Date ex. 2024-03-01 INFO
[Image2-1. System User]
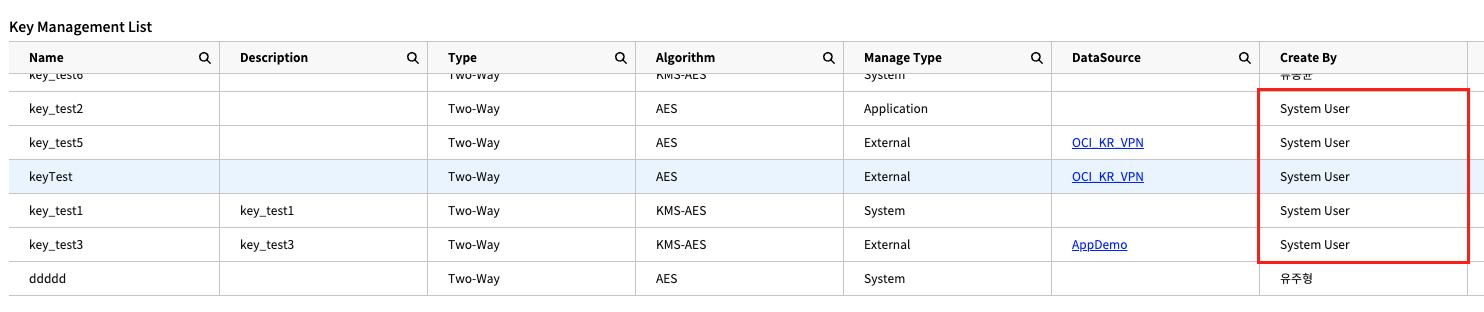
Keys created through provisioning display the creator name asSystem User.TIP
You can click the 'New' button at the top right to call the Key Creation Popup, or select a specific key and click the 'Delete' button to remove that key. When deleting a key, the following warning will be displayed, and clicking 'Cancel' will prevent the deletion.
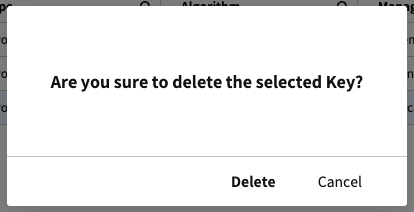
[Image2-2. Key Deletion Popup]Context
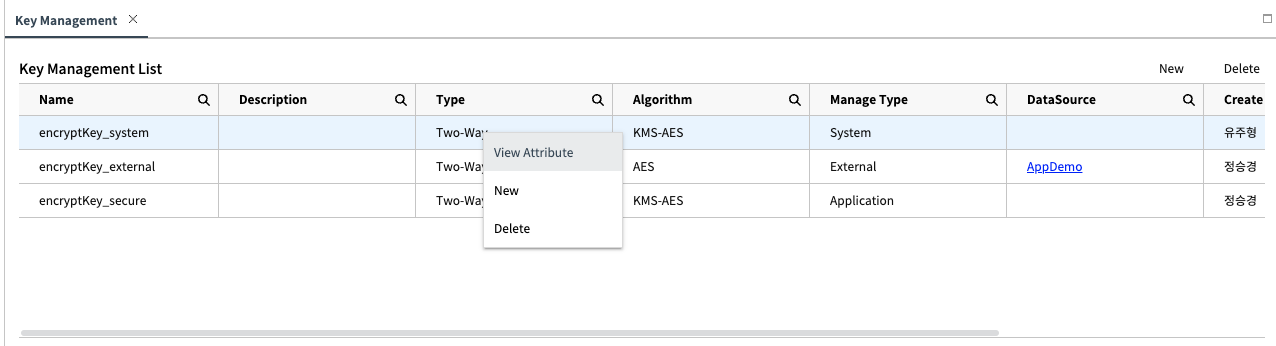
[Image3. Context Menu]After hovering over a specific key, you can call the Context Menu by right-clicking. Each item performs the following actions:
- View Attribute: Calls the Attribute of the selected Key. (ref. Attribute)
- New: Calls Popup to create a new key. (ref. New Popup)
- Delete: Delete the selected key. (ref. List - Delete)
Attribute
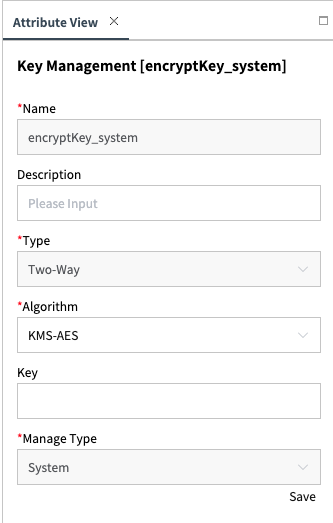
[Image4. Key Details]This is the area where you can edit the detailed information of the key. For security purposes, the Key value is displayed as blank.
INFO
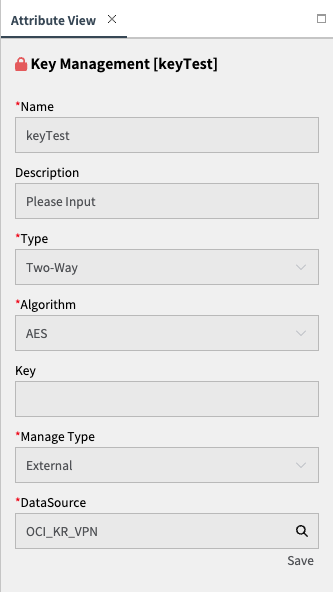
[Image 4-1. non-modifiable key]A specific key may appear as shown above when viewed on the Attribute screen for editing. This handling is separate from Studio's Lock and indicates that the data cannot be modified in the current environment.
Modifiable Value
- Description
- Algorithm
WARNING
When changing the algorithm, the value of the Key Field is reset, and a new value must be entered for saving. If changed accidentally, do not click
Save, instead, close the Attribute window. - Key
WARNING
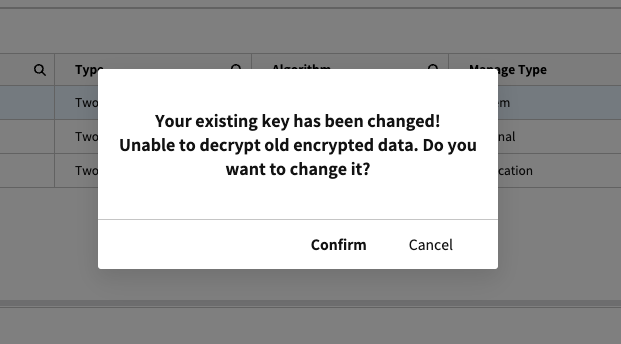 [Image4-1. Key Change Warning Alert]
When you change the value of a key, the previously encrypted data becomes inaccessible for decryption with the old key. After making changes, clicking
Savewill prompt a warning popup as shown in the image above to alert you of this consequence.
New Popup
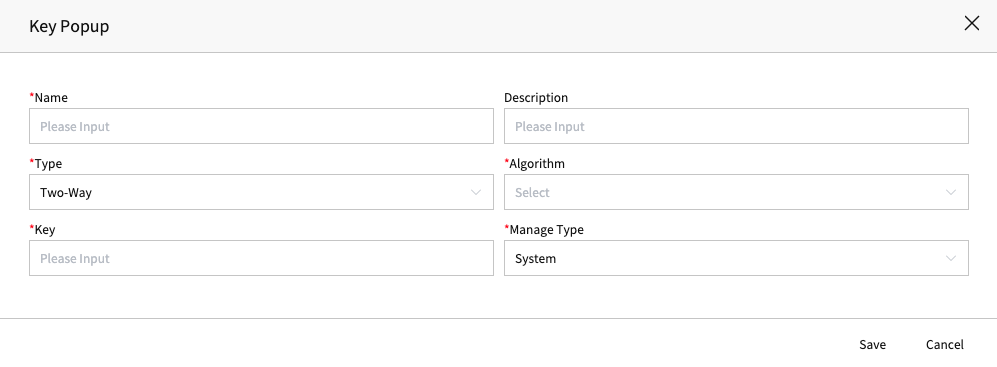
[Image5. Key Creation Popup]This is a popup for creating a new key.
You can click on Context - New to invoke it or click the List - New button to call it.INFO
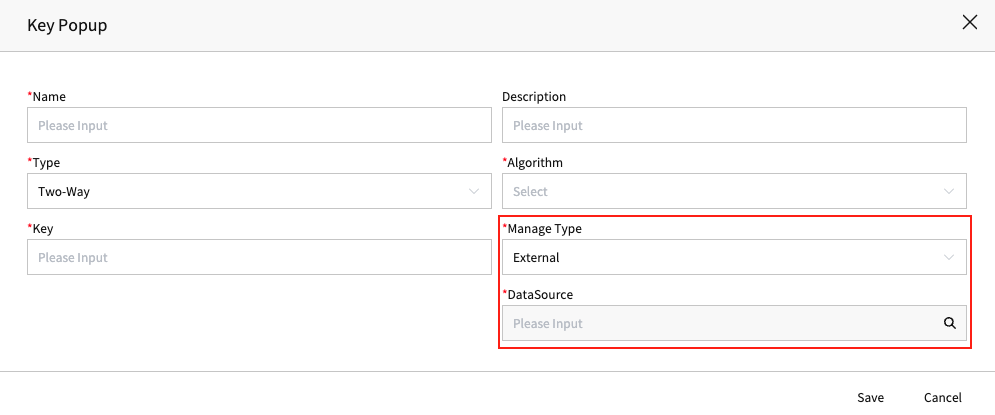 [Image6. DataSource Field]
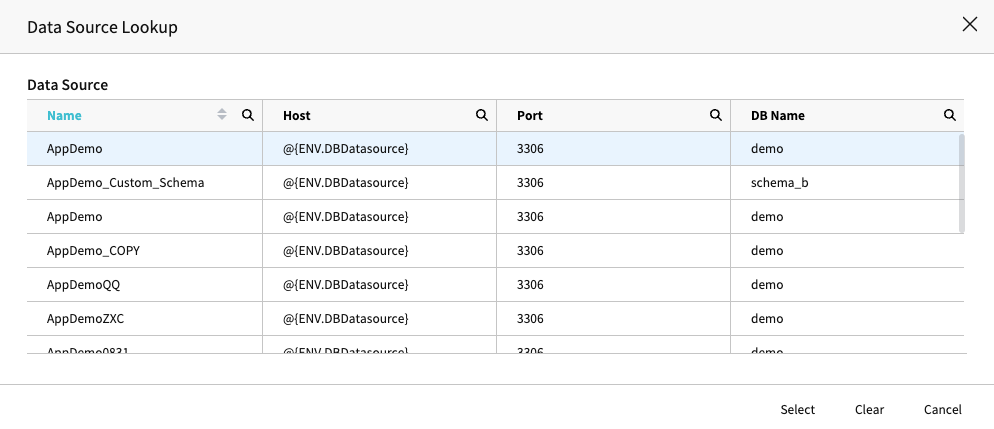
[Image7. DataSource LookUp]
The DataSource is only enabled when the Manage Type is set to
External,allowing selection as shown above.
How To Create
This explains how to generate a key. Be mindful when using keys, as they vary depending on the Manage Type, which can change the managing entity and the database.
System Key
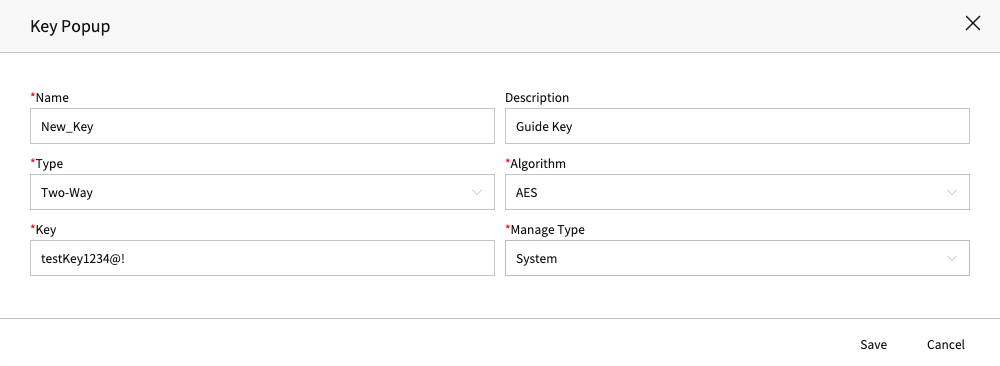
[Image8. System Key Creation]
- After entering the required fields, click the Save button to create it.
- System Key is managed by CALS.
Application Key
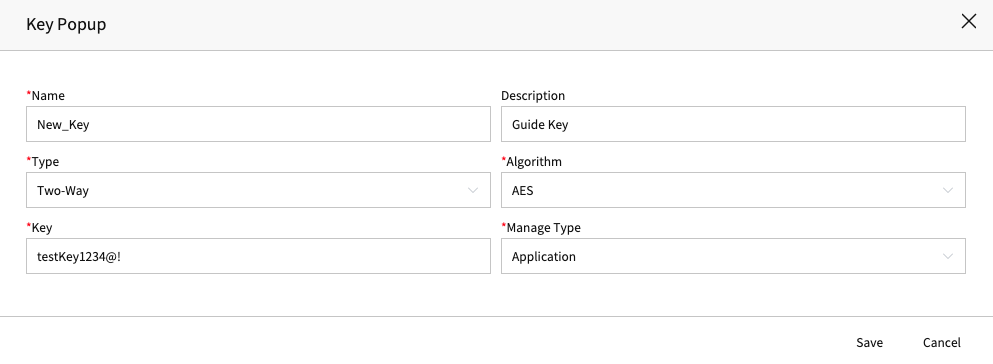
[Image9. Application Key Creation]
- After entering the required fields, click the Save button.
- The Application Key delegates the managing entity to the Application Database.
External Key
External Type requires a DataSourceduring a creation.
Afterward, it signifies the database that will manage the key, so it is essential to map it to the appropriate DataSource.
WARNING
If there is a connectivity issue with the mapped DataSource during the deployment, it may lead to deployment failure.
- Authorization issue..
- Host does not exis..
- Wrong Id or Pw
- etc...
INFO
Within the database you're attempting to connect to via DataSource, it's crucial to have a standardized qt_key_master table.
If you attempt to create a key without this table present, it will lead to errors during subsequent deployment. So, please proceed with caution.
- qt_key_master table creation query
CREATE TABLE `qt_key_master` (
`SYS_ID` varchar(32) CHARACTER SET utf8 COLLATE utf8_general_ci NOT NULL,
`SYS_CREATE_BY` varchar(32) CHARACTER SET utf8 COLLATE utf8_general_ci DEFAULT NULL,
`SYS_MODIFY_BY` varchar(32) CHARACTER SET utf8 COLLATE utf8_general_ci DEFAULT NULL,
`SYS_CREATE_DATE` datetime DEFAULT NULL,
`SYS_MODIFY_DATE` datetime DEFAULT NULL,
`SYS_TYPE` varchar(32) CHARACTER SET utf8 COLLATE utf8_general_ci DEFAULT NULL,
`SYS_FLAG` char(1) CHARACTER SET utf8 COLLATE utf8_general_ci DEFAULT NULL,
`TL_APL_ID` varchar(32) CHARACTER SET utf8 COLLATE utf8_general_ci NOT NULL,
`TL_ACC_ID` varchar(32) CHARACTER SET utf8 COLLATE utf8_general_ci NOT NULL,
`KEY_CODE` varchar(32) CHARACTER SET utf8 COLLATE utf8_general_ci NOT NULL,
`KEY_DESC` varchar(250) CHARACTER SET utf8 COLLATE utf8_general_ci DEFAULT NULL,
`ENC_TYPE` varchar(32) CHARACTER SET utf8 COLLATE utf8_general_ci DEFAULT NULL,
`ENC_ALGO` varchar(32) CHARACTER SET utf8 COLLATE utf8_general_ci DEFAULT NULL,
`ENC_KEY` varchar(4000) CHARACTER SET utf8 COLLATE utf8_general_ci DEFAULT NULL,
`ENC_DATA_KEY` varchar(4000) CHARACTER SET utf8 COLLATE utf8_general_ci DEFAULT NULL,
`KMS_ALIAS` varchar(32) CHARACTER SET utf8 COLLATE utf8_general_ci DEFAULT NULL,
`EDIT_FLAG` varchar(32) CHARACTER SET utf8 COLLATE utf8_general_ci DEFAULT NULL,
`EXT_ENV_CODE` varchar(10) CHARACTER SET utf8mb4 COLLATE utf8mb4_general_ci DEFAULT NULL,
PRIMARY KEY (`SYS_ID`,`TL_APL_ID`,`TL_ACC_ID`,`EXT_ENV_CODE`)
) ENGINE=InnoDB DEFAULT CHARSET=utf8mb4 COLLATE=utf8mb4_general_ci;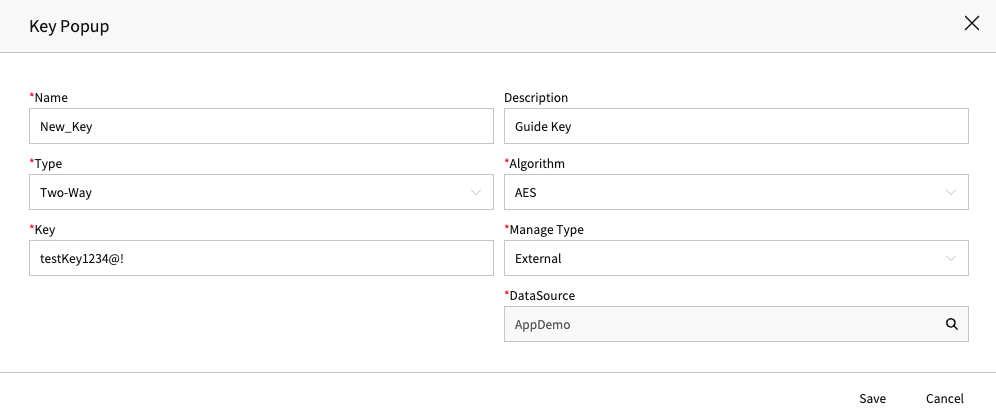
[Image11. External Key Creation]
- After entering the required fields, click the Save button.
- External Key delegates the management subject to
DataSource DBused during Config.
How To Use
Explains how to use the key when encrypting a column.
Column Encryption
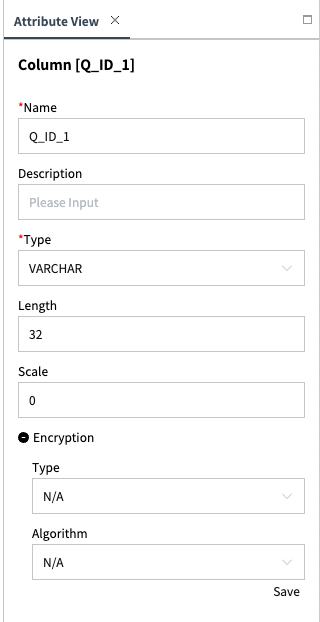
[Image12. Column Attribute]
After retrieving the attributes of the column you wish to encrypt, set the Type to Two-Way for encryption
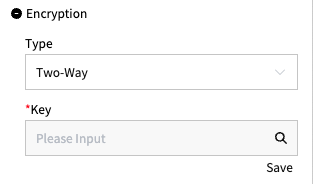
[Image13. Key LookUp Field]
After then,Click the Key Field to select the key to use for encryption.
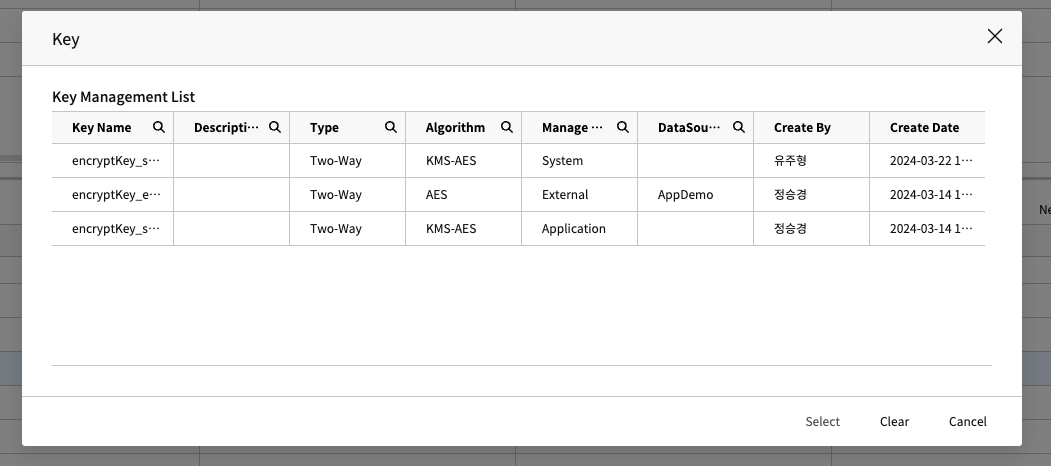
[Image14. Key LookUp]
Once you have completed entering the Key Field, click Save to save the changes.