Image
Image Upload
Previous Document Format
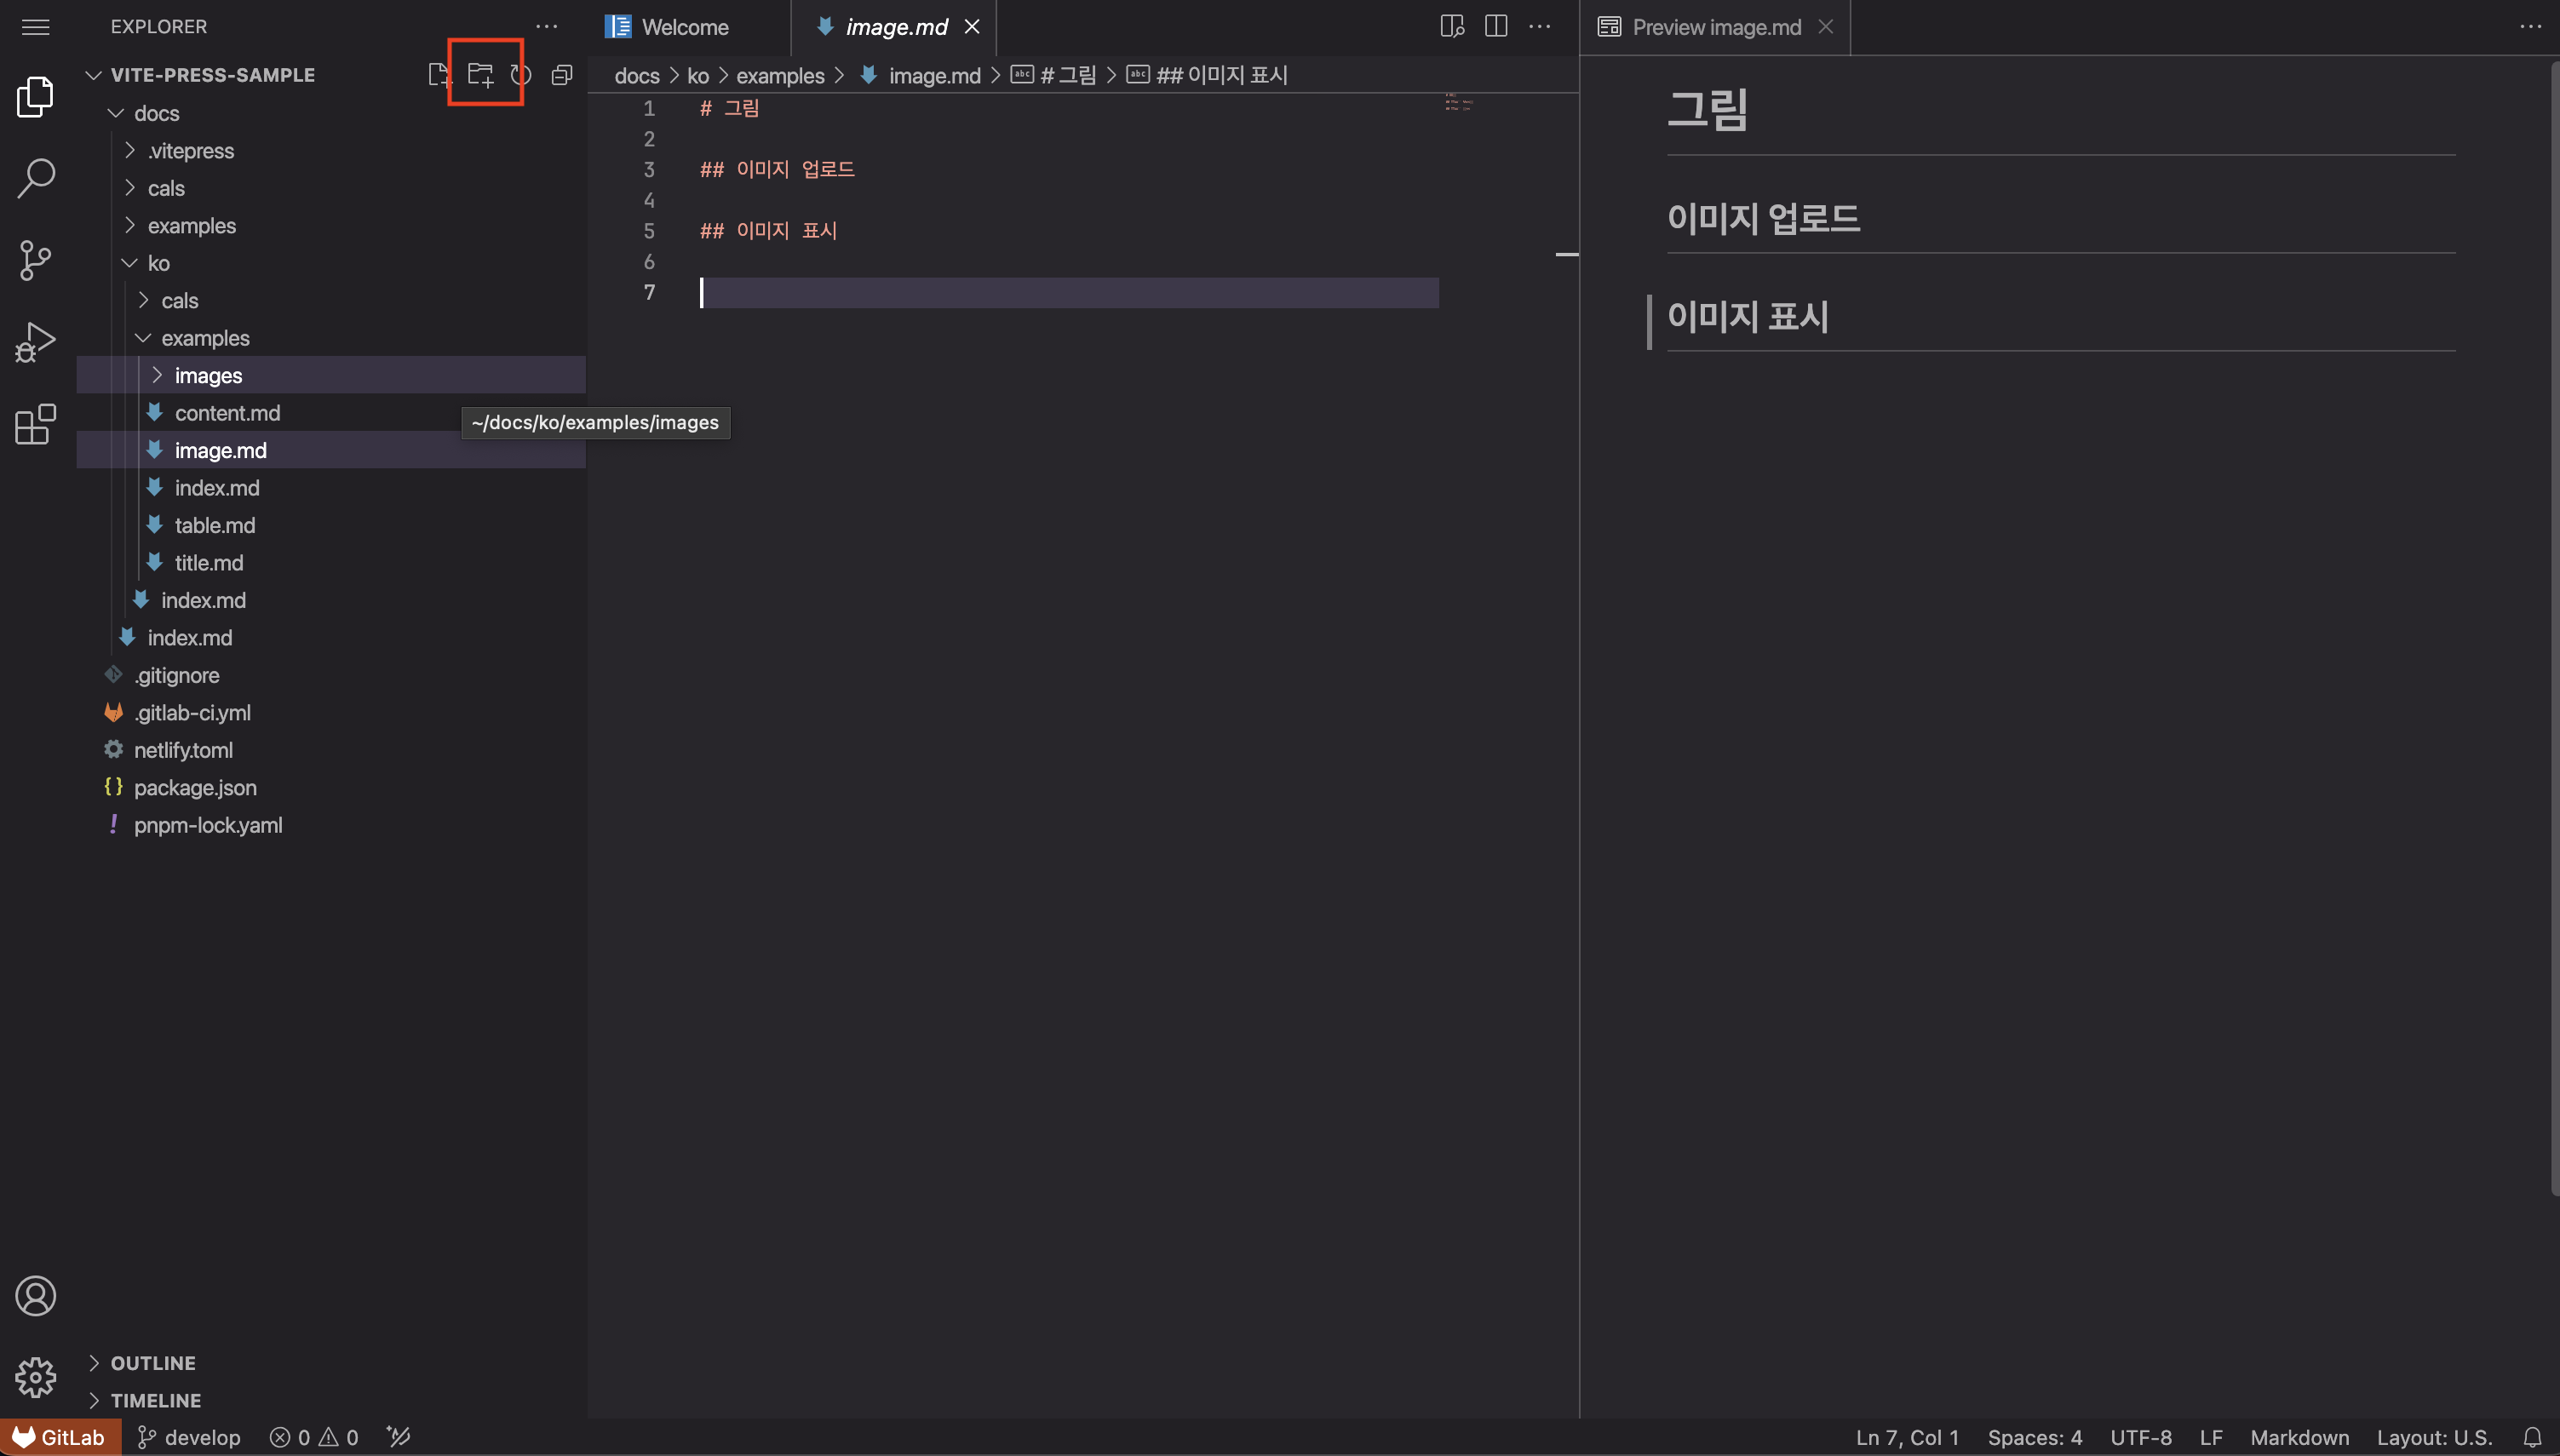
Folder Creation
TIP
If a folder has already been created in that path, execute the [Upload] (#upload) item first.
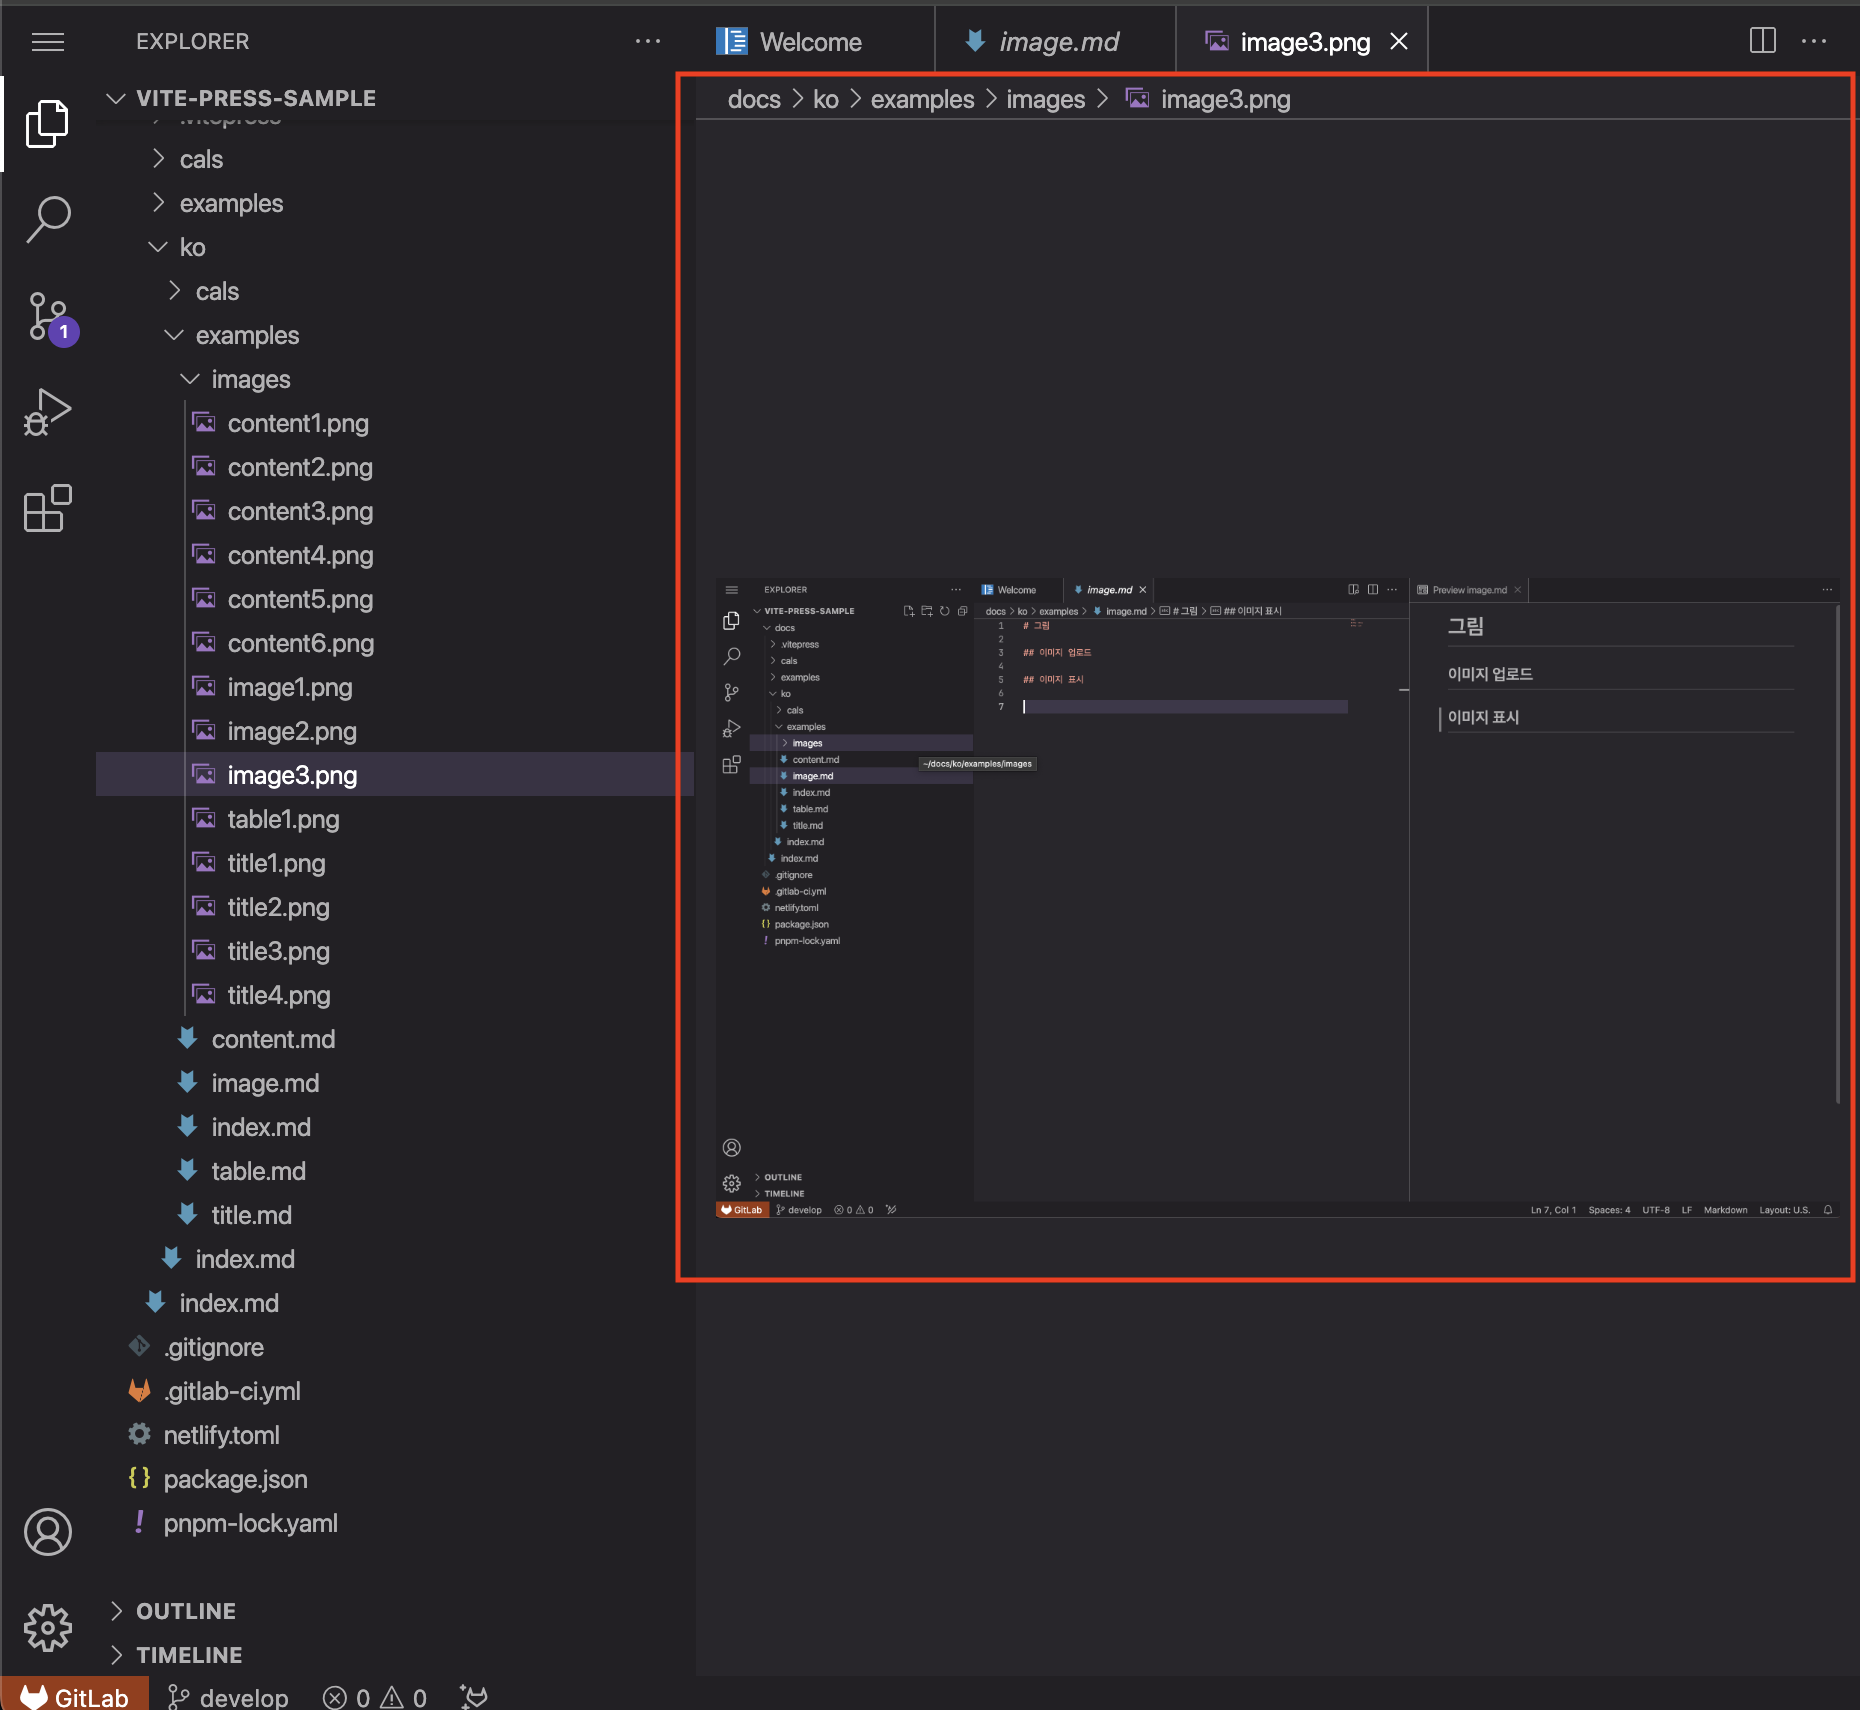
After selecting Explorer in the left activity bar area of IDE, create a folder where images will be uploaded as shown in the screenshot.
Upload
Drag & Drop the image into the target folder. 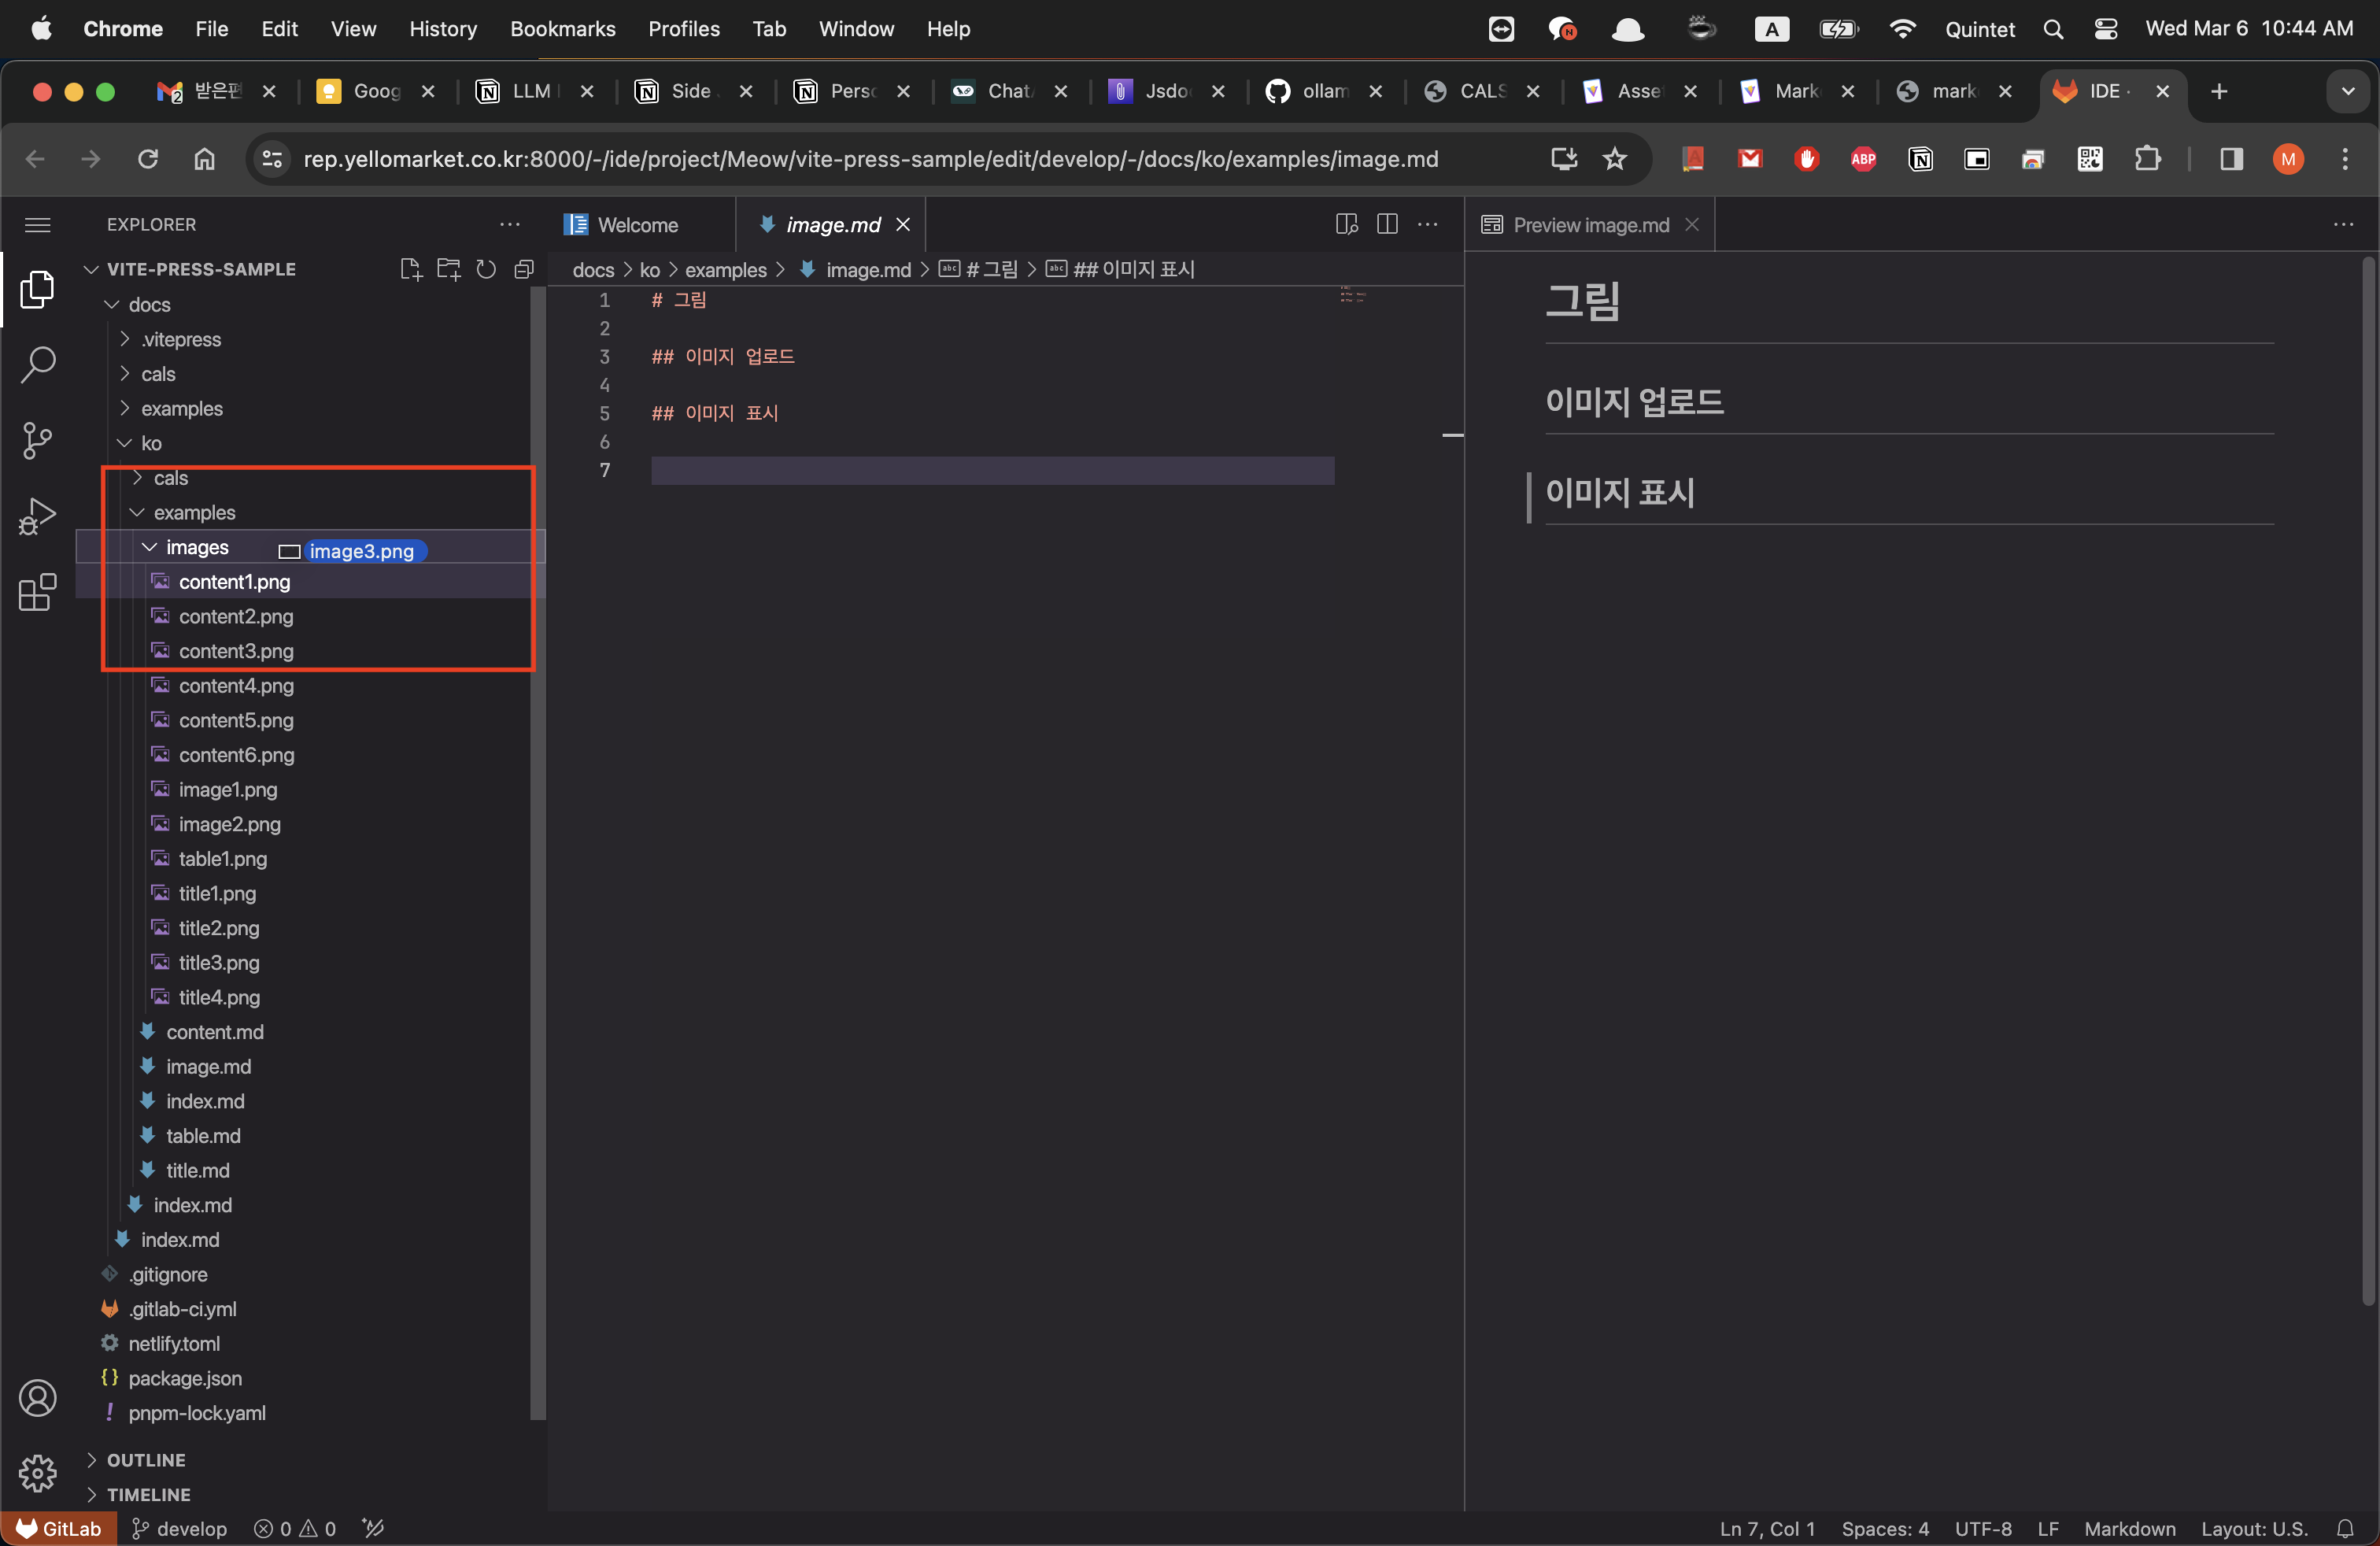
INFO
Uploaded images can be checked in the IDE.
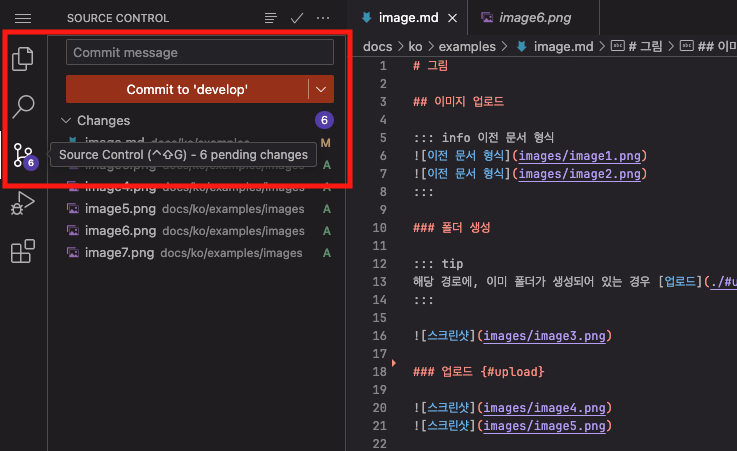
Commit
Commit should be performed with the message.
TIP
Image upload is also possible through git in addition to IDE.
Displaying Images
You can insert uploaded images into a document as follows.
Example
TIP
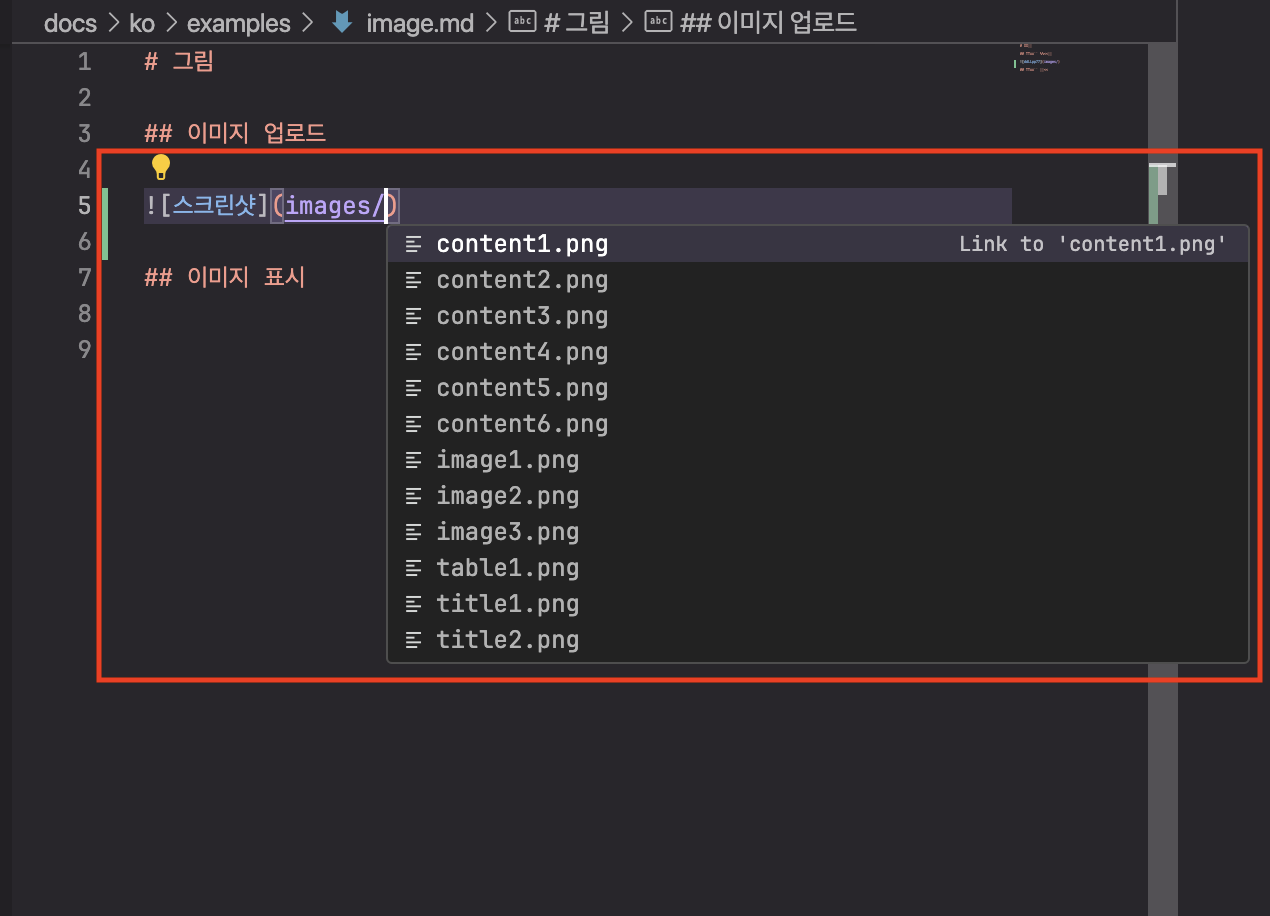
As shown in the screenshot below, autocomplete will appear as you start entering the correct path.
INFO
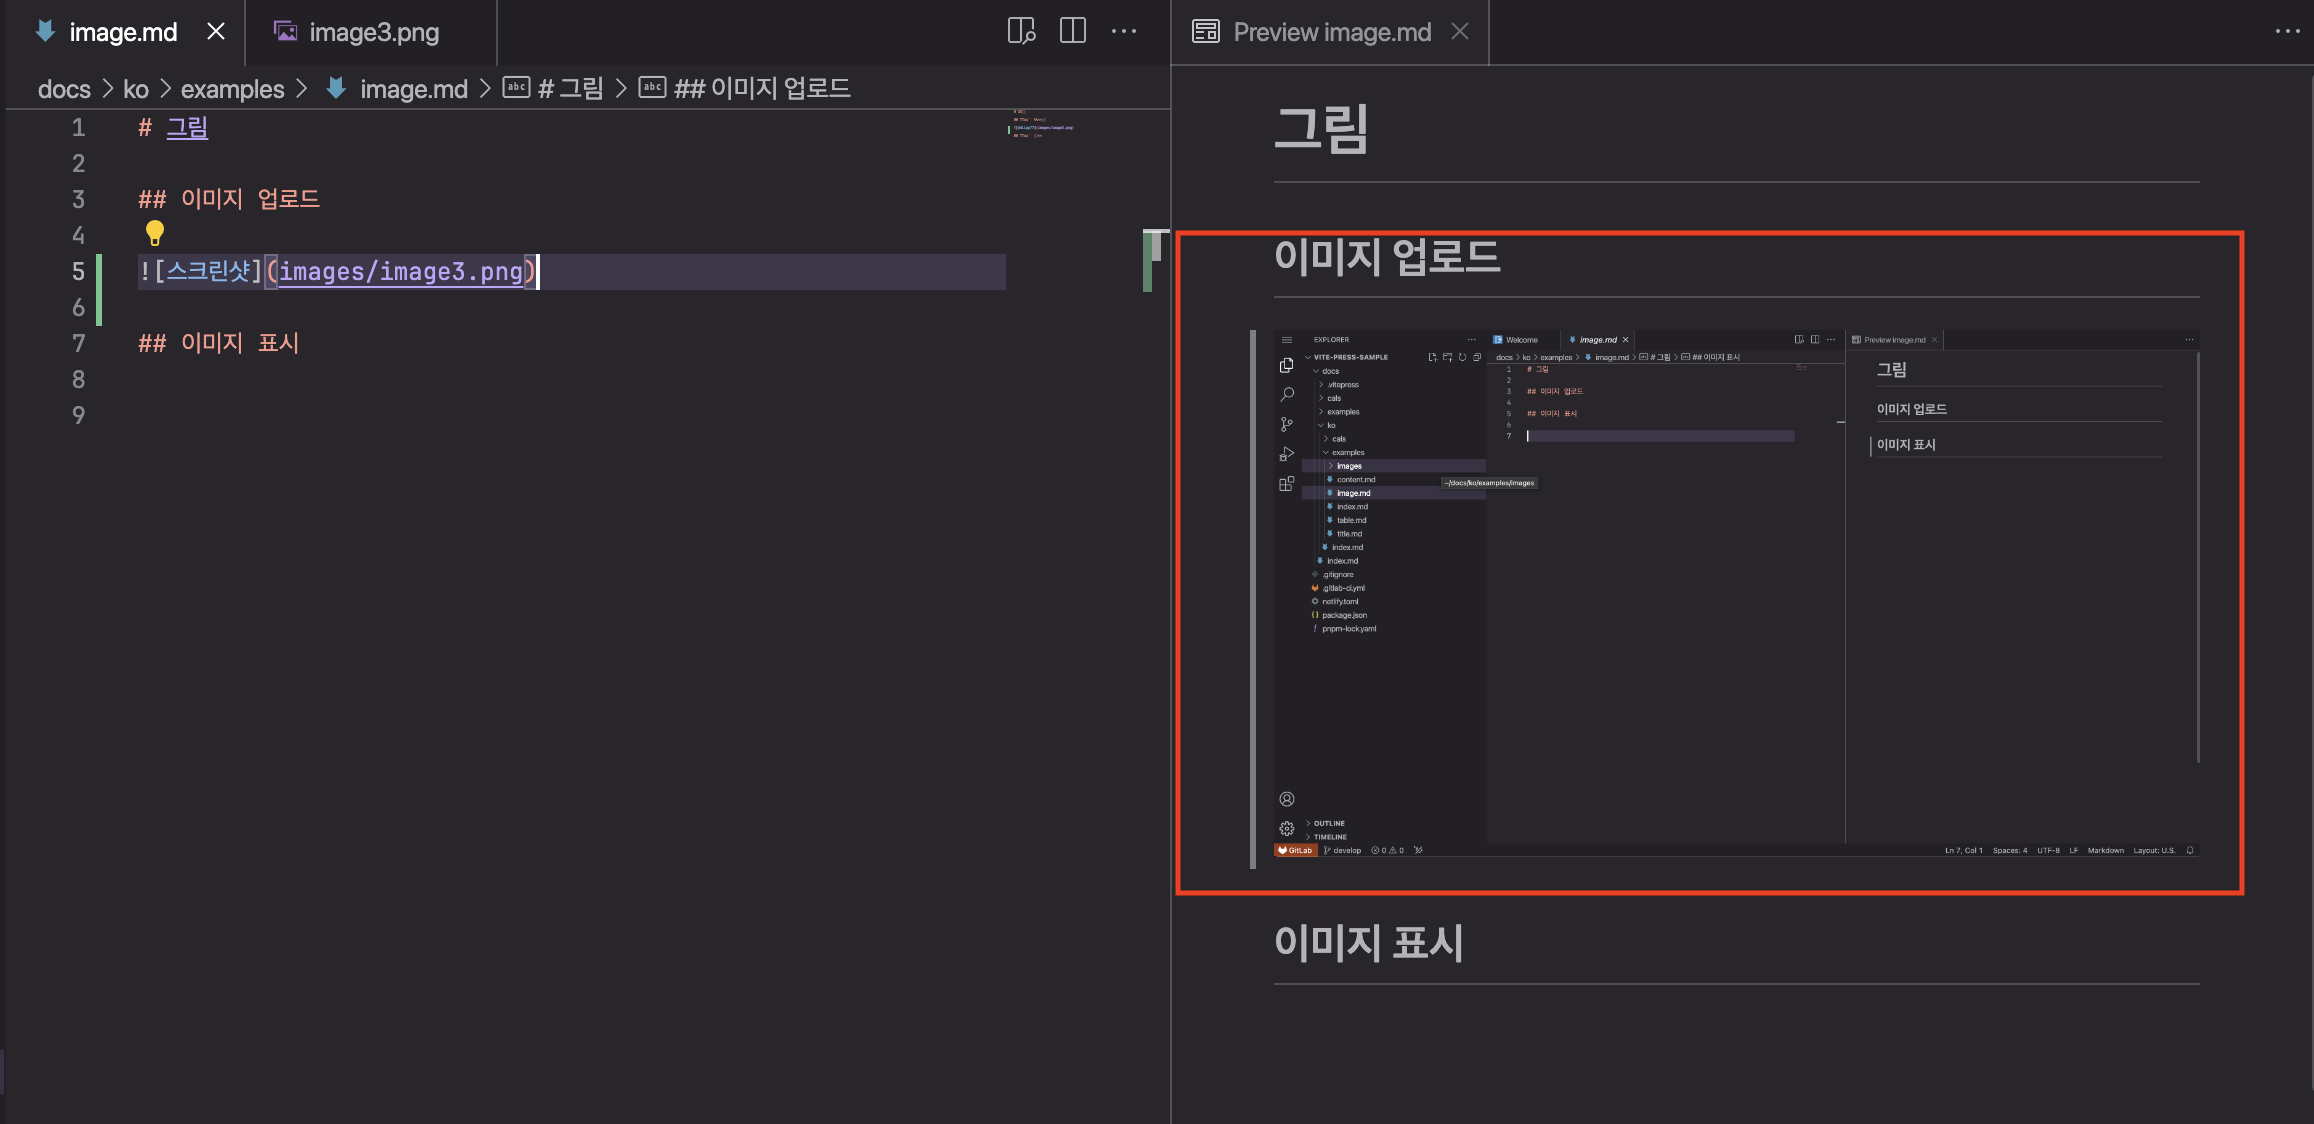
You can use the IDE's document 'Preview function' to see how the image is inserted into the written Markdown.
WARNING
The image path must be specified as a relative path. Absolute paths (starting with
/) cannot be referenced.